Posts

Beauty Collective - Red Carpert Golden Globes

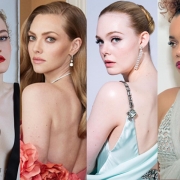
Red carpet ready – A step by Step on how to achieve our 4 favourite Golden Globe looks

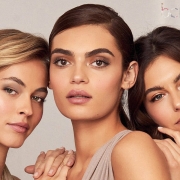
From bold coloured lips to glowy goddess-like skin, flawless winged eyes, to minimal makeup, this year’s nominees bought an abundance of glitz and glamour to the Golden Globes whether they were donning their looks from the luxury of their home, hotel suite or were actually ‘red carpet’ ready.

Read on to find out our favourite four makeovers from the night and a simple step by step on how you can recreate each look at home with only a few key products.
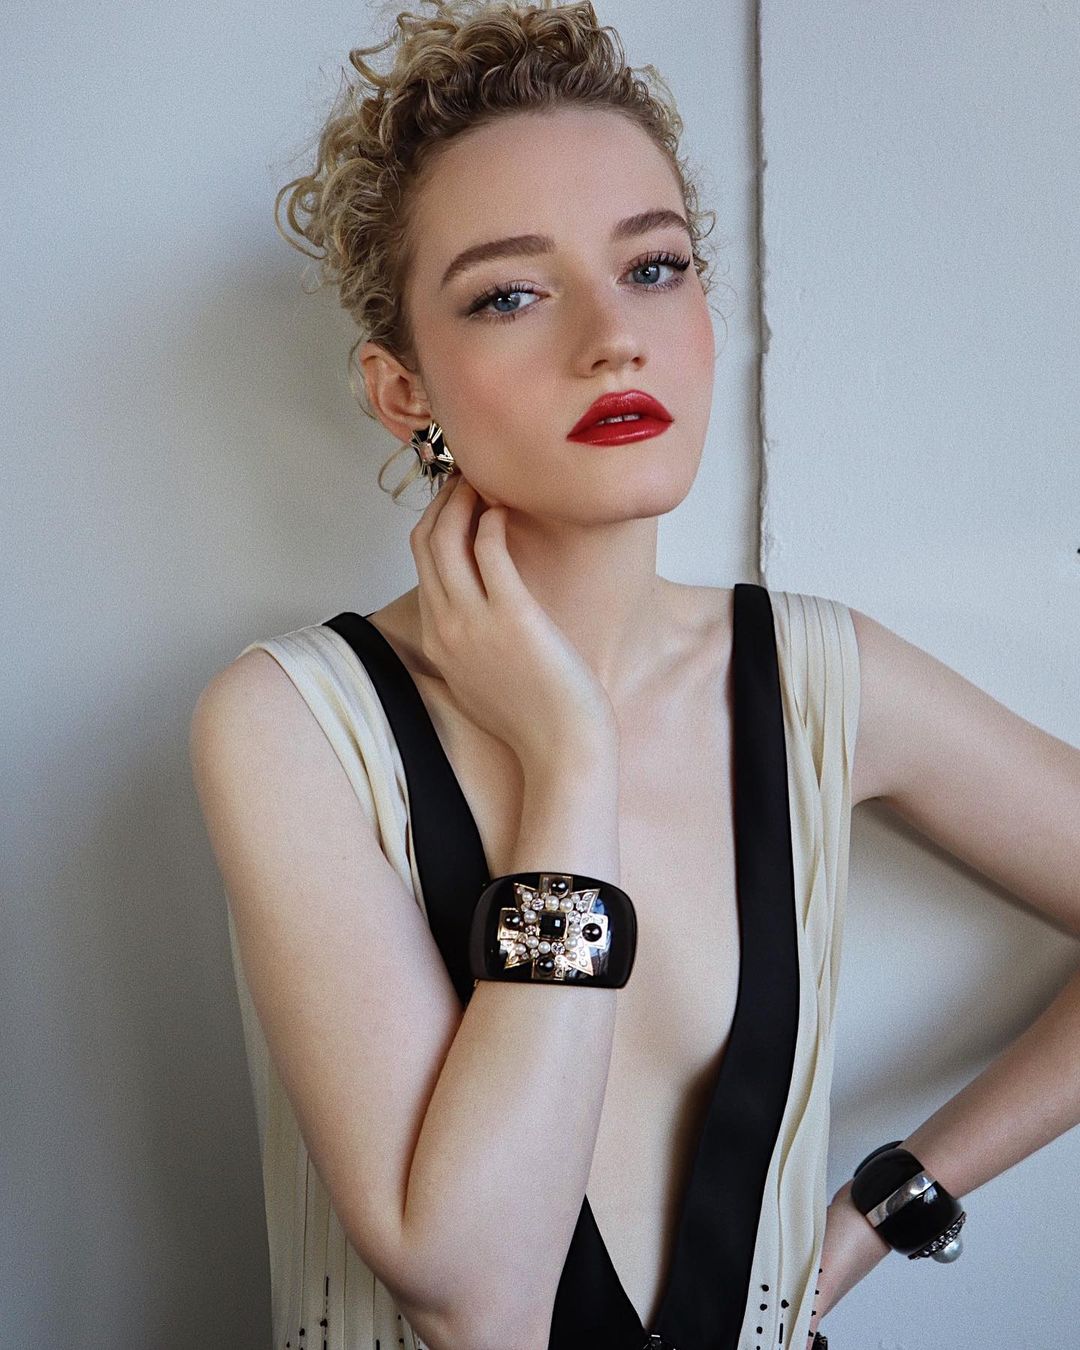
 

Julia Garner

Julia Garner

With deep cherry glossed lips and porcelain doll-like skin, Julia Garner seriously bought her A-game to this year’s Golden Globes.

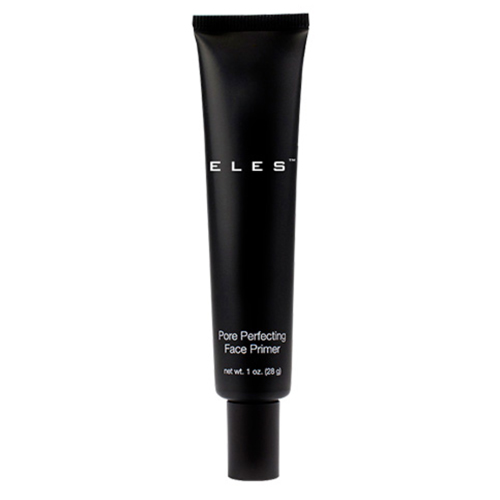
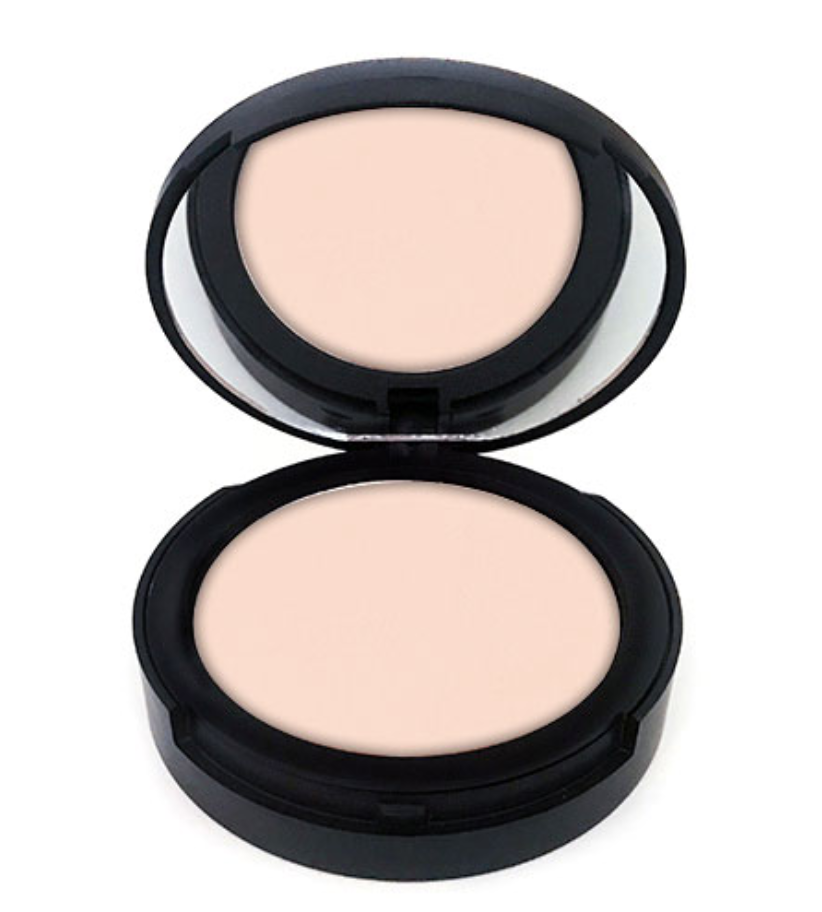
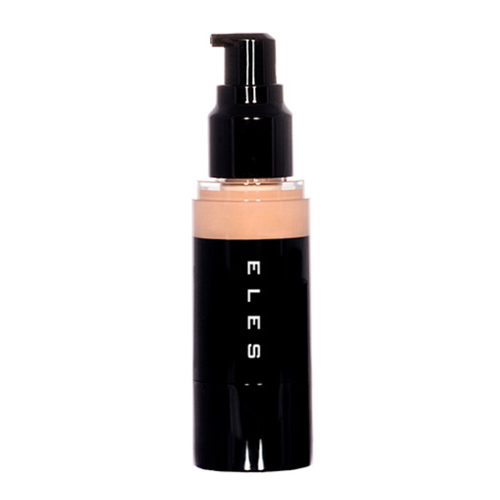
To achieve her flawless base simply opt for a long-lasting matte foundation. If you are usually a lover of liquid, yet plan on donning this look, I highly recommend the ELES Liquid Powder Mineral Foundation. It literally glides onto skin effortlessly yet sets to a soft matte powder finish that lasts all day. If powder is your go-to, then one of my favourites, and perfect for this look is the ELES Mineral Powder Foundation Compact. It creates buildable coverage from natural sheer to polished opaque.

ELES Liquid Powder Mineral Foundation SPF 15

Complete your base with a very soft and subtle pink blush like the ELES Baked Blush in Posey.

Next, it’s time to play up the eyes with focus on both eyebrows and lashes. Firstly, we recommend using the ELES Precision Brow Pencil, it creates ‘hairlike’ strokes for a more natural brow and the brush end of the pencil will come in handy if you’ve used too much product and need to soften the look. To create the illusion of Julia’s thicker brows (if yours tend to be on the thinner side like mine!), I also recommend using an eyebrow powder or shadow. While the pencil will help conceal any sparse areas, the powder will fill in, shape and thicken brows. Try ELES Brow Sculpt, it has one side powder, the other side colour coordinated tinted wax that will tame and set brows so they last day and night!

Beauty Collective - ELES Cosmetics - Brow Sculpt

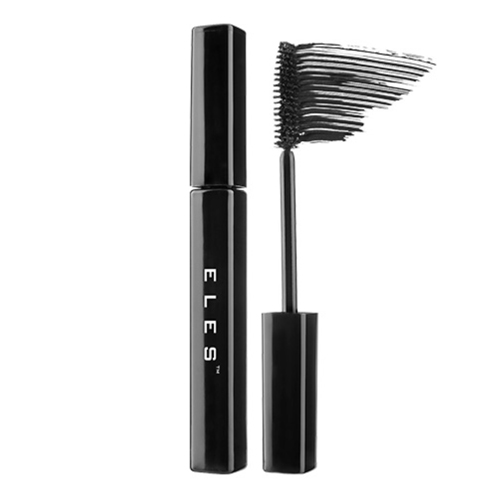
Julia’s eyes are all in the lashes. Firstly though apply a wash of mineral matte eyeshadow in vanilla to your entire eyelid all the way to the inner corner using a base shadow brush for ease. The light shaded shadow will really help to open up your eyes. Next layer on coats of ELES Lush Mascara in Black to both the upper and lower lashes applying from the base to the tip in a slow sweeping motion. To create the illusion of Julia’s long alluring lashes allow mascara to semi-dry in between coats.

Beauty Collective - ELES Mineral Matte Shadow Vanilla

To complete the look, firstly line your lips with a blood red lipliner which perfectly matches the lipstick to follow. The lip liner will give your lips structure and act as a primer to help bind the lipstick to the lips. Carefully line your lips just outside your natural lip line. Fill the rest of your lips in with the liner then reach for your beautiful bold blood-red lippie. We love the ELES Moisture Crème Lipstick in Cool Red. Follow with ELES Colour Balm in Classique for Julia’s subtle gloss coated finish.


andra day highlight on point

Andra Day

With plum ombre lips and a perfectly paired gold highlighter, Andra Day’s look is breathtakingly beautiful, yet easy to achieve! We promise.

To create her glowier than glowy complexion, firstly, apply a dewy foundation. We love the ELES Mineral Sheer Tint. Seal it with the ELES Baked Finishing Powder in Diffused Light. It’s like a warm filter that evens out dark shadows and discolouration, leaving skin looking poreless and perfect!

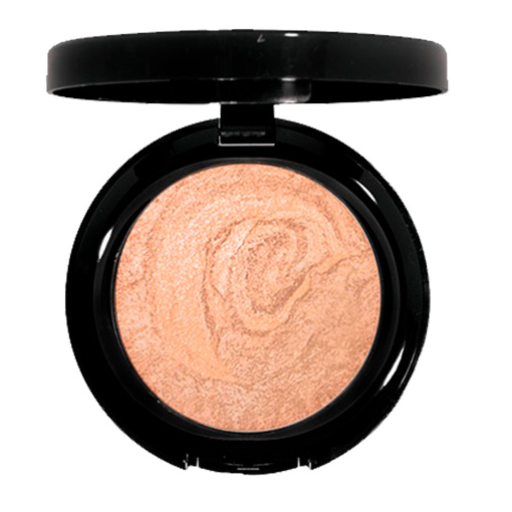
Next take a bronzer (try the ELES Baked Bronzer in Sunbeam, a beautiful fine powder bronzer with a subtle pearlized finish) and a tapered detail brush, and define your jawline by applying it at a downward angle on either side of your chin. Then to sculpt the cheeks apply bronzer using sweeping brush strokes under the entire length of the cheekbones and blend, blend, blend!

Beauty Collective - ELES Baked Bronzer in Sunbeam

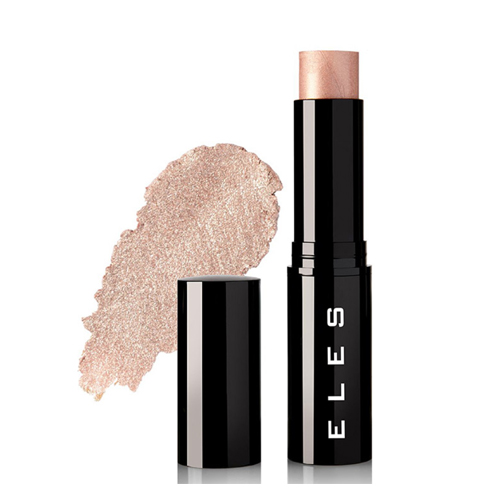
Now add instant radiance and colour to your face using the ELES Baked Blush in Rose Gold. Then enhance your features like never before with the ELES stick Illuminator. Apply it to the centre strip of your nose starting from the top to the tip of your nose, right above the perimeter of the jawline (this is the trick to making your face look slimmer), under the arches of your brows, and to the highest point of your cheeks for that healthy glow.

ELES Stick Illuminator

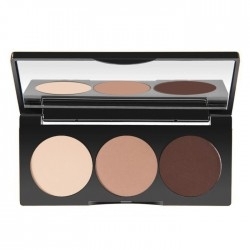
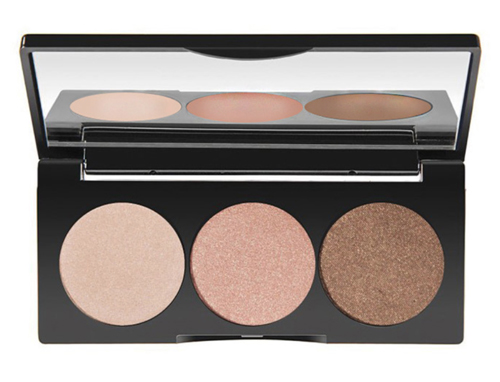
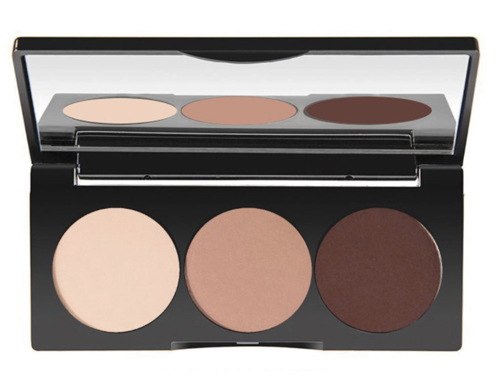
For Andra’s shimmery standout eyes, use the ELES The Naturals Collection Eyeshadow Trio in Delicates, a versatile collection of 3 beautiful earth tone eye shades within one convenient palette.

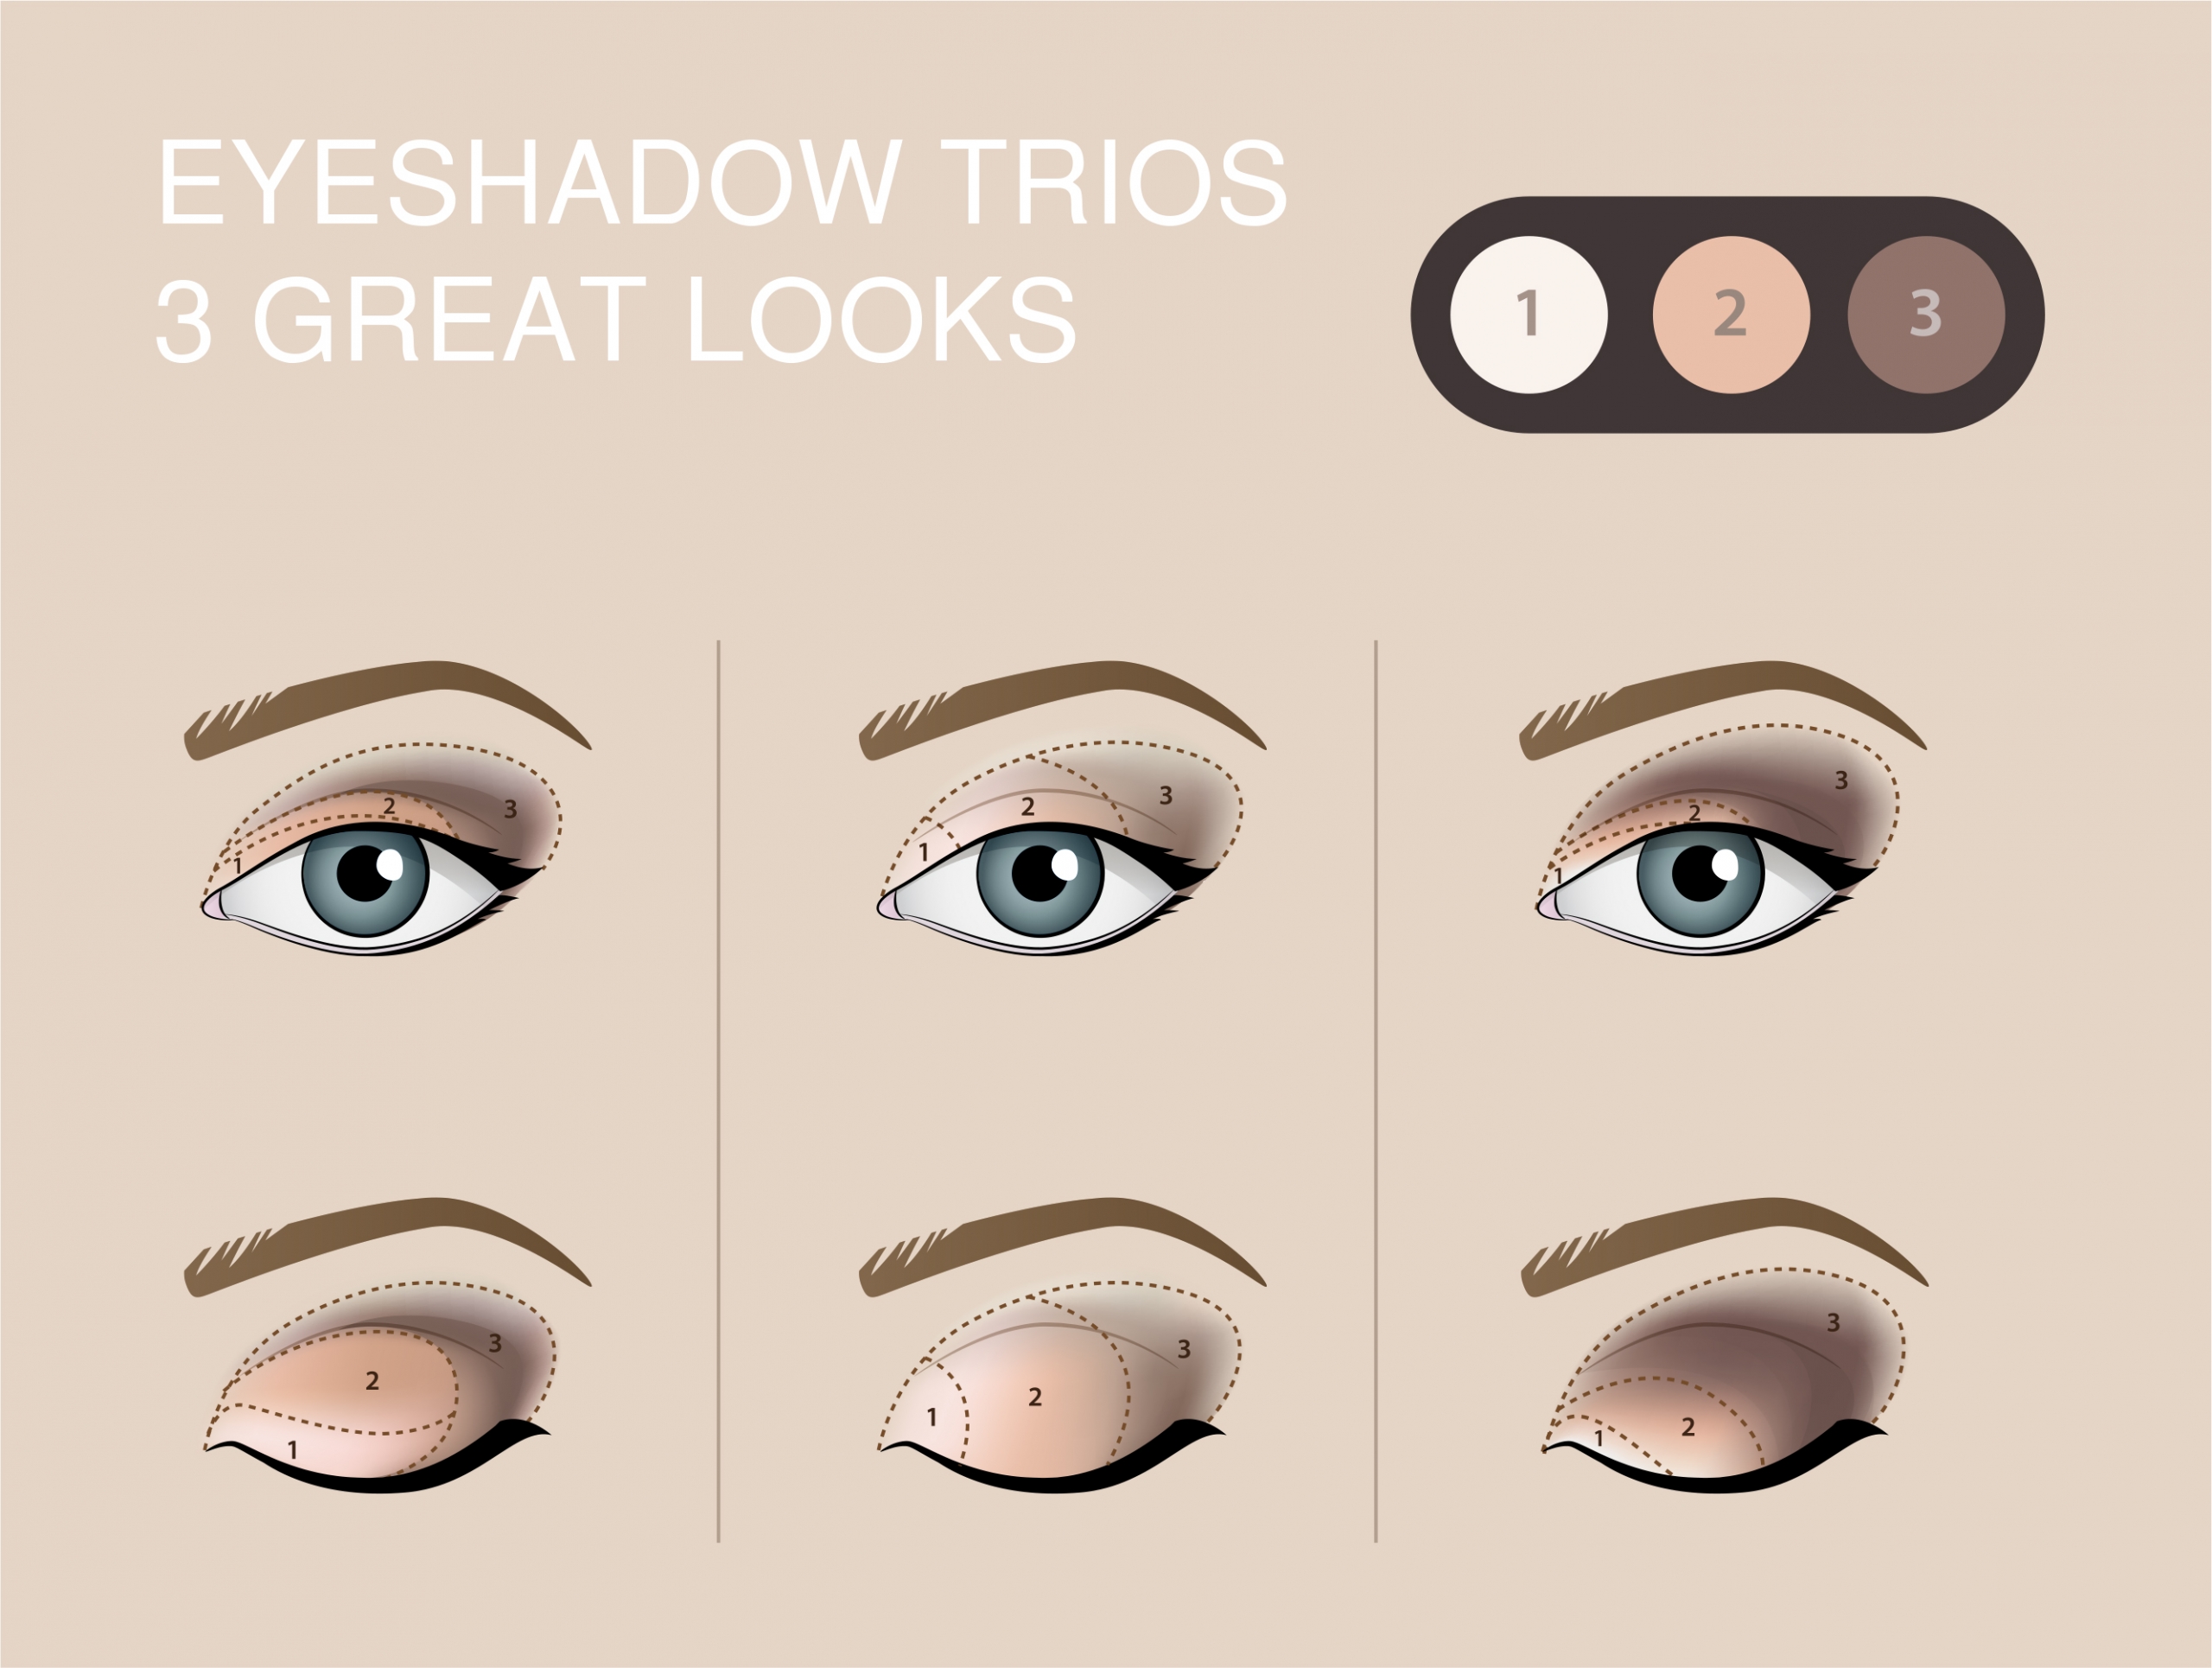
Firstly apply the lightest shade to your entire eye lid, all the way to the inner corner using a base shadow brush for ease. Next using a tapered blending brush apply the medium shade into your crease (the curve above your eyelid) blending from the outer corner’s inwards. Finally use the same brush to apply the darkest shade to the outer corner of your eyelid, then extend it outwards and upwards and blend it inwards slightly. Finish with lashings of ELES Lash Fortify Mascara in Black.

To complete the look, line your lips with ELES Gel Lip Liner in Plum and carefully blend filling in lips, then apply your lipstick – we love ELES Moisture Crème Lipstick in Aubergine, followed by swipe of ELES Lip Stain in Pin Up Girl.
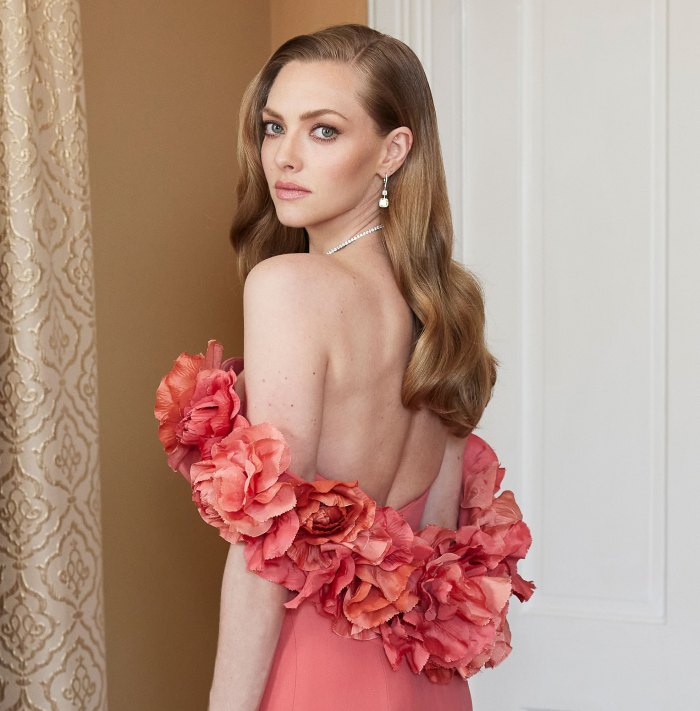
 

Amanda Seyfried

With bold brows, bronzed cheeks and soft, smoky eyes, this year’s Golden Globes saw A-lister Amanda Seyfried glow like a goddess.

To create her look firstly apply a natural lightweight foundation. We love the ELES HD Foundation. Its lightweight formulation melts onto skin and provides undetectable coverage with a subtle radiant finish. Follow with a powder bronzer to contour beneath your cheeks and jawline to slim the face and create the illusion of perfectly sculpted cheekbones. Try ELES Anti-Oxidant Bronzer to achieve Amanda’s perfectly matte bronzed complexion that will last all day.

Beauty Collective - ELES HD Luminous Foundation

Next focus on the eyes. To achieve this soft, smoky eye look, you’ll need three eyeshadow shades – a light, medium and darker. Start by applying the lightest shade (a nude) over your entire lid, all the way to the inner corner using a base shadow brush. You really need this light shadow to perfect the look and open up the eyes to make colour ‘pop’. Next use a tapered blending brush to apply your medium shade into your crease (the curve above your eyelid) blending from the outer corner’s inwards. Now use the same brush to apply the darkest shade to the outer corner of your eyelid. Extend it outwards and upwards to create a smoky effect, then blend it inwards slightly. To nail Amanda’s eyes, we recommend using ELES’s The Naturals Collection Eyeshadow Trio in Cool Nakeds.

To complete the look, instead of using eyeliner, use the darkest shade of your shadow. Simply use a flat definer brush and press the dark shadow lightly along the edges of your upper eyelid where your eyelashes begin and along the lower lash line. Then finish with lashings of mascara.

For that subtle flush of colour on the lips, use a lip liner to gently fill in (we recommend the ELES Gel Lipliner in Naked) and then add a touch of gloss like the ELES Pucker-Up lipgloss in Love Bite for that subtle hint of shine. If you prefer lipsticks, try the ELES NEW Velvet Satin Lipstick in Lauderdale Place.
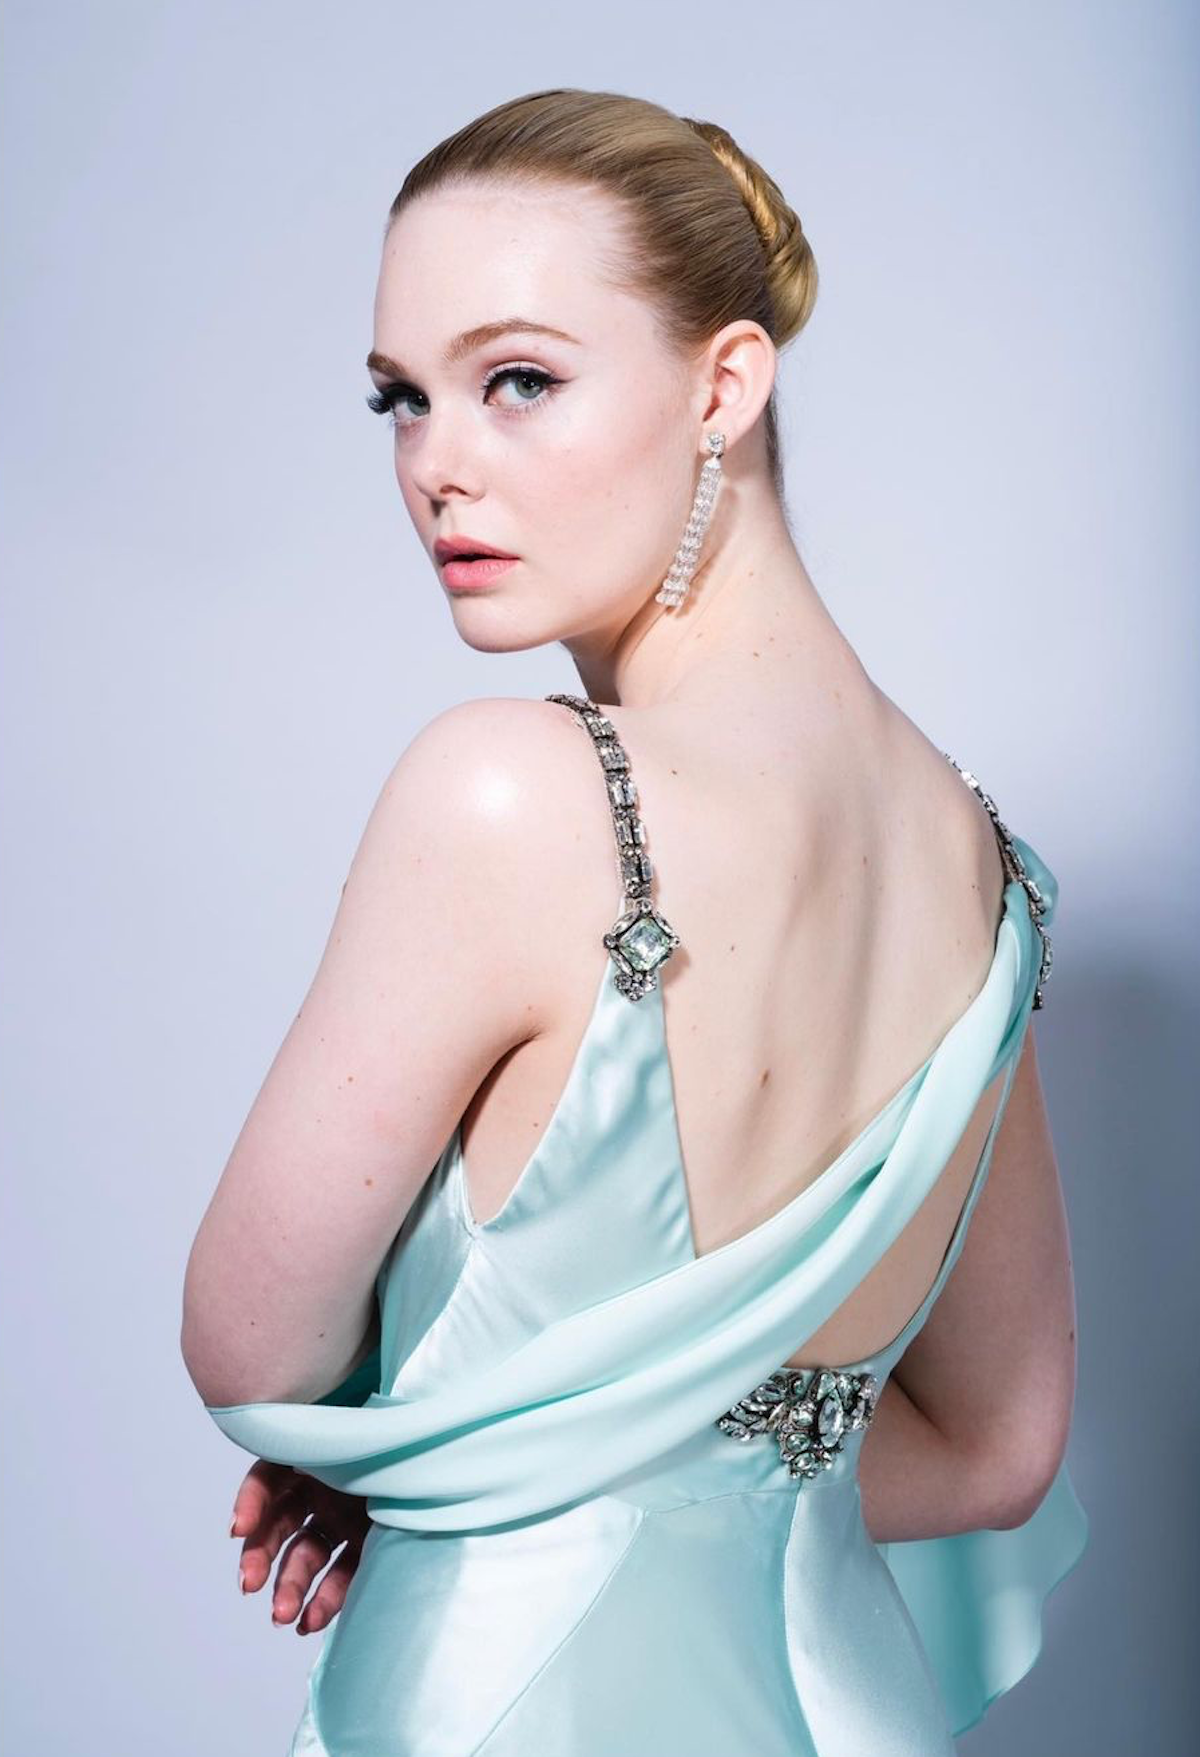
 

Elle Fanning

Flawless winged liner, rosy rouge cheeks and nude lips came together to create a stunning ethereal look for Elle.

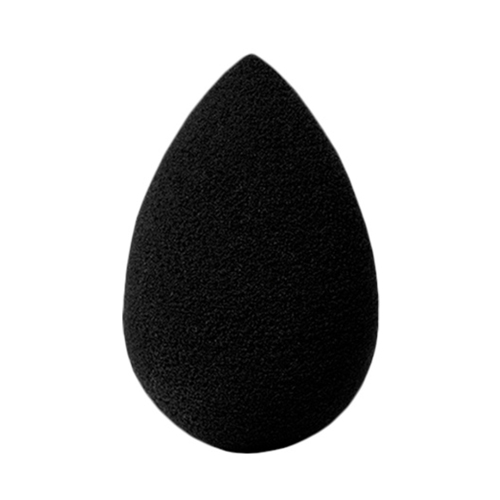
To recreate ELLE’s makeup, firstly apply a matte powder as your base. Try ELES Mineral Powder Foundation and gently blend with a Beauty Blender for flawless coverage. Next, add a swipe of blush to the apples of the cheeks before focusing on the eyes.

ELES Pro-Blender sponge

Many steer clear of the winged eye look because they fear it is too tricky, but we promise you it’s far from it and once you’ve mastered it you’ll never look back. First things first, the make the initial line. Using ELES Felt Tip liner in Black draw a short, thin line from the outer corner of your eye extending the natural curve of your lower lash line to your desired length. If you have trouble getting a smooth line freehand, try making a series of small dots and then join them together or simply use a piece of tape or stencil as a guide. Draw a line across the upper eyelid, following the natural curve of your upper lash line from the inner corner of your eye to the outer corner of your eye and continuing to parallel the first line you made. Focus on creating a smooth line. Now that you have your outline fill in the gaps with more eyeliner. Apply a little lush mascara to both upper and lower lash lines.

Beauty Collective - ELES - Lush Mascara

Finally pencil in brows with ELES Precision Brow Pencil and colour lips with ELES Matte Lipstick in Bare.

Beauty Collective - ELES - The Naturals Collection Eyeshadow Trio - Cool Nakeds

Mastering eyeshadow application. Why and how you should wear it

Ever been seduced into buying a new eyeshadow palette of tantalising shades only to discover the majority of them are unwearable? Or you simply have no idea where to start when it comes to applying them?

Let’s face it, applying eyeshadow correctly, I’m talking multiply layers of varying shades to create stand out eyes, is an art form! So it’s no surprise that many of us either get it wrong or simply shy away from shadow! But wearing eyeshadow correctly can have a big impact on the way we look…and for the better! It has the power to enhance, define and complement your eyes in all but a few simple sweeps, you just need to know how!

So read on to discover our top tips and become the master of your own eyeshadow destiny in next to no time. You won’t be disappointed with the results, trust me!


  1. Go neutral

If you’re starting out on your eyeshadow journey its best to keep things simple. By using just a few neutral shades you can contour your eyes and add depth and dimension in a soft and subtle way. We are in love with the new ELES Naturals Collection Eyeshadow Trios. A choice of not one, but four palettes in a combination of three beautiful earth tones to suit everyone! The soft and subtle powder shadows apply smoothly and effortlessly and since they are pigment packed, every shade delivers rich, opaque colour for hours of crease-resistant wear!

Natural - EYE EYESHADOWS

  1. Use the right brushes!

Know those little foam wands or brushes that come in some eyeshadow compacts? Ditch them! They are awful for applying product with precision!

Flawless eyeshadow application is ALL in the brushes! So investing in a good eyeshadow brush (or three!) is paramount as it’ll help laydown powder shadows, setting them in place for the day. Opt for a dense base shadow brush to impart colour on the lid first, a blending brush for blending and highlighting and a flat definer brush to line and define your eyes! Don’t worry we are about to tell you how to use them!


  1. Apply shadows in the correct order (follow our diagram)

Have your palette at the ready but unsure which shade should go where? This handy diagram should become your go to;

EYESHADOW TRIOS 3 LOOKS DIAGRAM

  1. Lightest ‘highlighting’ colour
  2. Medium shadow colour
  3. Darkest ‘smokey’ colour


Start by applying the lightest shade (a white or nude) from your palette over your entire lid, all the way to the inner corner, using a base shadow brush. You really need this light shadow to perfect your look as it’ll help open up your eyes and make your colour ‘pop’. Just be sure to use your brush in a dabbing not dragging motion though as this is the key to applying ‘streak-less’ shadow!

Next use a tapered blending brush to apply a medium shade into your crease (the curve above your eyelid) blending from the outer corners inwards.

Use the same brush to apply the dark shade to the outer corner of your eyelid. Extend it outwards and upwards to create a smoky effect so to speak, then blend it inwards slightly. Applying this darker shadow slightly beyond your crease is the key to adding real dimension to your eyes.

Additional tip: If you want to take your look from day to night up the anti! Don’t let the neutral shades fool you. By dampening your brush you can add intensity, just be sure to apply your foundation after your eyes are finished so any eyeshadow fallout can be easily dusted off.


  1. Complete your look

Eyeliner, when applied correctly can make your lashes look thicker and your eyes wider. So to complete your look, instead of using an eyeliner, you can use the darkest shade of your shadows to create an impactful, well defined eye. Simple use a flat definer brush and press the dark shadow along the edges of your upper eyelid where your eyelashes begin and along the lower lash line. The finish with lashings of mascara.


Yes it’s that simple! And with practice comes perfection.
8 expert tips for the ultimate spring skincare routine

8 expert tips for the ultimate spring skincare routine

Spring is well and truly in the air, but with a change in season, comes a change in our skincare concerns, so it is important to now adjust your daily routine just as you would your wardrobe. From switching up your diet, upping your exercise and updating your skincare products, it’s time to put some pizzazz back into your skin after the cold, winter months.

Not sure where to start though? We’ve got you covered. Read on for the best skincare tips and products on how to achieve truly radiant spring skin, as recommended by the beauty experts at BC.

1. Exfoliate away dry winter skin

Polish away post winter dullness to reveal a layer of fresh new skin. It’s best to opt for gentle exfoliators and fruit peels that you can use once or twice a week. Follow with a moisturising mask as this will also aid your skin’s recovery.

I love Pevonia’s Gentle Exfoliating Cleanser, it’s great for those who love physical exfoliators with granules but want to steer clear of facial scrubs which could be a little harsh on the skin. It gently polishes your complexion with its unique creamy yet granular texture, formulated with jojoba beads, saponaria and chamomile, revealing a softer, smoother and brighter complexion every time! However, if your preference is for an exfoliator free of microbeads or grains, one of my absolute favourites is the Phytomer Vegetal Exfoliant with Natural Enzymes. It combines natural vegetable enzymes with vitamin E to eliminate impurities, blackheads, dead cells and toxins without scrubbing the skin. I promise you your skin will be smooth, soft and radiant after one application!

Follow with one of my go to masks Pevonia’s Ageless Skin Collagen Mask. Formulated with collagen, squalane and shea butter, it deeply penetrates the skin for outstanding hydrating and skin-plumping results.

Pevonia Gentle Exfoliating Cleanser blog

2. Go lighter with your moisturiser

In winter, we tend to reach for the richer, heavier creams in hope they’ll combat our dry, dehydrated skin, but swapping your daily moisturiser for something a little lighter is key for spring, this is because our skin retains more water during the warmer months so heavier formulations can lead to clogged pores and pesky pimples!

It’s important though to find the right balance between nourishing and light lotions or creams to complement your daily regime and boost your spring glow. We recommend a hyaluronic acid or water-based formula to add dewiness to your complexion but not over saturate your skin. This is because they help achieve hydration from within the skin as opposed to just sealing in moisturiser from the outside. Pevonia’s Age Defying Marine Collagen Cream is one of my all-time favourites. It’s light and silky and you can feel and see it immediately replenishing moisture on application restoring supple, soft and glowy skin every time!

Pevonia Age Correction Marine Collagen Cream

3. Up the SPF

While a moisturiser with an SPF 30 is fine for winter, upping your SPF factor to 50 can make a huge difference in spring as we are exposed to higher UV rays in the warmer months. By using a high factor sunscreen daily, you will not only decrease your risk of skin cancer but also increase your change for healthier, smoother and more youthful skin.

My go-to in the spring and summer months is ELES Luminous Defence Brightening Day Protection SPF 50, not only does it protect skin against the sun’s harmful rays it’s also helps prevent discolouration while diminishing existing dark spots, all whilst calming and brightening your complexion!

Or why not, like me, double up and use SPF in both your skincare and makeup! I can’t recommend enough the ELES Luminous CC Cream 20 (which also happens to be a best-seller on BC!) it’s a lightweight, oil-free, colour correcting cream with broad spectrum protection which quite literally diminishes imperfections, while brightening skin in one fell swoop!

ELES - CC Cream 20

4. Prioritise Vitamin C

In the warmer months, when the sun is shining, UVB radiation is at its strongest, so it’s important to not only prioritise SPF but Vitamin C in our skincare too! Vitamin C when applied topically not only boosts our skin’s natural tolerance to the sun, but it is able to help control the formation of pigmentation as well as significantly lightening its appearance too! So make sure you are armed with a great vitamin C serum or cream. I can’t speak more highly of Pevonia’s C Complexe with Oxyzomes. Two pumps and radiant looking skin instantaneously.

Optimal C Complex

BONUS: In the month of September if you purchase this product, you’ll receive a FREE full size Pevonia Gentle Exfoliating Cleanser too!

5. Use eye cream daily…if you don’t already

With more time spent in the sun over the warmer months, it’s important to understand you’re be at higher risk of developing fine lines and wrinkles around the delicate eye area. To minimise this, make sure you incorporate an eye cream or gel into your daily skincare routine. We highly recommend Pevonia’s “C” Evolutive Eye Gel to hydrate and protect our eyes. This soothing and cooling gel with high-tech time-release spherulites delivers protective and decongesting benefits to the delicate eye zone all day long.

What’s more it’s made with an outstanding trio of ingredients including Vitamin C, Hyaluronic Acid and Ginkgo Biloba so perfect for spring skin.

6. Add pore perfecting and mattifying products to your routine

For many, the transition into spring can leave you with more shine and oil production then you bargained for. Therefore, your spring skincare line-up should include products that will help your skin shine the right way, by mattifying areas of your face that could become overly oily. Try introducing a primer to keep makeup in place throughout the day. ELES’s Pore Perfecting Face Primer is an oil free primer which combats shine, absorbs excess oil and reduces the appearance of my pores! As a result, my foundation is a breeze to apply and remains fresh and flawless throughout the day! So, if your skin tends to be on the oily side give this product a go!

ELES Pore Perfecting Face Primer

7. Transition to a lighter foundation

It’s best to steer clear of the thicker, heavier foundations you might have been accustomed to over winter as the heat and humidity bought about by the warmer months can lead to sweat and clogged skin, potentially causing breakouts. Switching to lighter products like a BB Cream or mineral powder foundation will balance out the extra oil production and leave your skin looking healthier.

ELES - Mineral Powder Foundation

I can’t get enough of ELES’s best-selling Liquid Powder Mineral foundation. It’s light silky formulation quite literally glides onto your skin and then sets to a soft powder finish, providing beautifully natural coverage with no shine!

If however your skin tends to be more on the drier side and it’s more of a dewy glow you’re hoping for try ELES’s Mineral Sheet Tint you won’t be disappointed!

ELES Liquid Powder Mineral Foundation SPF 15

8. Facial mists will be your friend

As the weather heats up and skin dries out, make sure you are armed with a good hydrating facial mist. They not only cool the skin but keep it hydrated throughout the day. We love the convenient Pevonia Phyto Aromatic Mist, it’s a must-have for its calming and nourishing properties.

Pevonia Phyto Aromatic Mist

shrink pores fast

5 ways to effectively reduce your pores

If you suffer from uneven skin tone or your enlarged pores appear to be a permanent feature on your face, we feel you.

Believe it or not, many of us are as obsessed with our pore size, as we are with skin ageing! But why is it some of us suffer from large pores? And how can you shrink them fast?

As we age, our body produces less Elastin and Collagen and without these two, our skin becomes much less supple and starts to sag. It’s the collagen in our skin which actually strengthens the walls of our pores, making them tighter, so when this breaks down with age our pores become enlarged! And to make matters worse, when these enlarged pores become clogged with oil and dead skin cells, blackhead and whiteheads may form. When bacteria comes in contact with these two, a pimple is born! So something which we thought was associated with teenage years can return to haunt us when we hit our 30’s and 40’s +!

While your pore size is genetic (thank you parents!) and therefore you can’t alter its structure, the good news is there are a number of tips and treatments you can live by, which will help not only reduce pore size but leave you with smooth and even skin too!


  1. Introduce an exfoliating cleanser

And not just any old exfoliator, one formulated with AHA’s (Alpha Hydroxy Acids) such as Citric Acid, Glycolic Acid and Lactic Acid, and/or BHA’s (Beta Hydroxy Acids) such as Salicylic acid. These are the holy grail of ingredients when it comes to penetrating and cleaning out your clogged pores, and clogged pores look bigger, fact. So by unblocking them you are already halfway there in terms of reducing their size.

While all four acids exfoliate on a cellular level, Glycolic, Citric and Lactic works on a more surface level to brighten and smooth your skin, whereas Salicylic Acid penetrates much deeper to effectively remove dead skin cells clogged in pores.

For those who are more prone to pimples, we highly recommend Pevonia’s Clarigel Exfoliating Cleanser. Formulated with both Citric and Salicylic Acid, it delivers intensive cleansing for problematic skin, gently removing impurities and rendering skin clear, clean and smooth.

Pevonia Clarigel Exfoliating Cleanser

For those with enlarged pores we are loving Vie Colletion’s Renewing Exfoliating Cream. Designed to make the skin look renewed, radiant and youthful (yes please!) it smoothes away roughness while dramatically reducing large pores appearance!

3 VIE Collection Renewing Exfoliating Cream


  1. Use a skin primer

A good skin primer will become your lifeline if you are prone to oily skin. Not only will it stop your foundation from sliding off your face quite literally, it’ll keep your base smooth while reducing the appearance of pores (and fine lines!)

I’ve tried many a primer in my time but as a sufferer of oily skin and pores on the, let’s say slightly larger side! My go-to is the ELES Pore Perfecting Face Primer. It’s oil-free (of course), perfectly lightweight and seems to combat shine almost instantly. It contains a natural Dermat Complex which enables it to absorb oil and effectively reduce pore size in one hit.

ELES Pore Perfecting Face Primer


  1. Wear sunscreen daily

You hear this time and time again but we are serious. Do it. The number one cause of premature skin ageing is the sun. The less we wear sunscreen the sooner our collagen will break down causing skin to sag and pores to expand! Whether you choose to use a daily moisturiser or foundation with SPF is up to you, but using a sunscreen is paramount.

We are in love with ELES Cosmetics’ best-selling Liquid Powder Mineral Foundation SPF 15, Free of pore-clogging oils, this silky, mineral-enriched liquid foundation with broad-spectrum sun protection, glides on velvety smooth but sets to a soft powder finish. It’s ideal for all skin types even those with really oily skin and perfects your complexion while protecting against future damage.

ELES Liquid Powder Mineral Foundation SPF 15


  1. Opt for a pore perfecting moisturiser

Yes it’s a thing! If you aren’t already using one, you simply must now. Formulated to quite literally refine pores for a smoother, flawless complexion free of shine you won’t believe the results. Our go-to is Pevonia’s Age Correction Micro-Pores Refine Cream. It’s a mattifying treatment cream which reduces oil production and pore size, while providing long-lasting hydration at the same time.

Pevonia - Age Correction Micro-Pores Refine Cream


  1. Give retinol a go

Hailed THE anti-ageing ingredient of the skincare world, retinol is known to not only slow down the signs of ageing (as a result of its ability to increase your skin’s collagen production) but also simultaneously decrease oil production which leads to smoother skin, fewer breakouts and tighter pores!

If you haven’t before now, introducing a retinol cream at night will be a game changer for your skin, just be sure to opt for a more gentle retinol cream and slowly introduce it into your skincare routine as some can be a little sensitive to it at first, but the wait is soo worth it we promise!

We highly recommend the Medicalia L Retinol Smoothing Cream. Combining Retinol with Glycolic and Lactic Acids (ah yes those two faithful pore perfecting acids again!) it is a must for resurfacing and regenerating skin for a smoother brighter appearance!


Medicalia L Retinol Smoothing Cream

To understand more about retinol read our guide to the best anti-ageing ingredient.